

I start this post on a dreary Wednesday morning after a long, impromptu hiatus. What better time to journal than when the the weather is this yucky? Now, that’s what! Granted, I had started this post a little while back, but as Life so often does, it got in the way. I hope this past weekend treated everyone well and that you’re ready to read my little tidbit of info in the Bullet Journal corner of the Intertubes!
How It All Started
I began using the Bullet Journal system back in August of 2016 after using spending the summer using The Happy Planner (HP) by Me and My Big Ideas (MAMBI). I love MAMBIs discbound planner system. The discs make it super easy to remove pages and decorate, write, plan, etc., and add the page back into the planner. The problem I ran into was that there wasn’t enough space in both the vertical layouts (Classic and later Big) and the horizontal layout of the Mini when it came it out (which is so adorable and handy, y’all!). Pinterest came to my rescue! (Seriously, what would us Crafters do without Pinterest?)
When I had been looking into the HP, I vaguely recalled having seen some info on this other system called the Bullet Journal. But, as I’m sure many others before have done, I got hung up on the word “journal” and passed it by because “planner” hadn’t been in the title. After some research, I regret not having taken the time in the first place to look into it when I began my Path to Planning Peace.
The Bullet Journal (Bujo) system is simplistic in its idea. Ryder Carroll, the creator of the system, designed it to be whatever you needed and to be forgiving if you didn’t get to something, such as a task for example, that day. The even better part? You don’t need to go out and buy a fancy, pre-printed planner; You can simply use any notebook of your choice and any pen (or pencil!) of your choice.
Yes, you read it correctly. Any notebook. Any pen. Boom. You already got the supplies you need to use the system. Now, the more gung-ho users of the system will get really fancy with brush pens, draw, add stickers (or use stamps), and use washi (crafting) tape. Don’t let those things deter you from using the system because you don’t need them if you just need a single place to keep track of all the things you need to keep track of. Some people don’t need the extras to be productive, some people need to use the extras to do the same thing. As the saying goes, “You do you.”
The Notebook Cover
After looking through the available discbound systems, I decided on the TUL system. At first, I bought the fancy Junior size leather cover, but more recently as evidenced by my Instagram post, I went with the Letter sized, clear polyproplene cover.
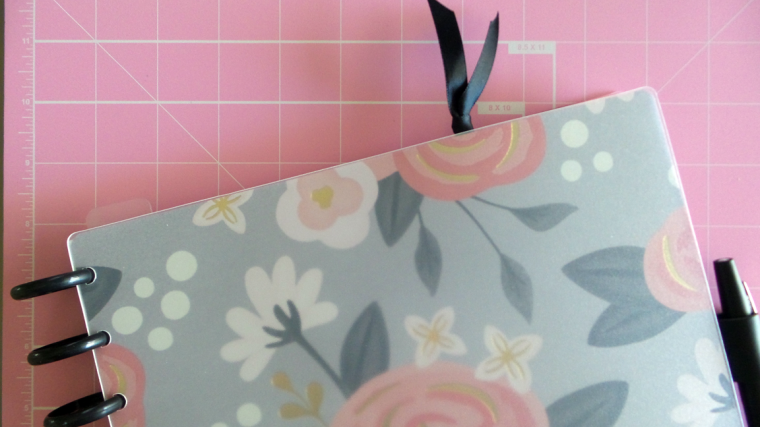
I chose this cover with the idea in mind that I could take any 12″ x 12″ cardstock scrapbook paper that suited my mood or season. The cardstock used in the above photo will probably be my “go-to” cover. It’s not overstated, but just bold enough for my tastes to be eye catching. Compared to the regular HP covers, the polyproplene over that TUL makes is a little more physically flexible than MAMBIs so if that’s one of your concerns, I’d go with the leather option (although they’re rather limited in terms of color, IMO, as well as being a limited edition). In terms of flexibility and creativity, I think I’ll stick with the clear poly cover for the time being.
Inside the Notebook
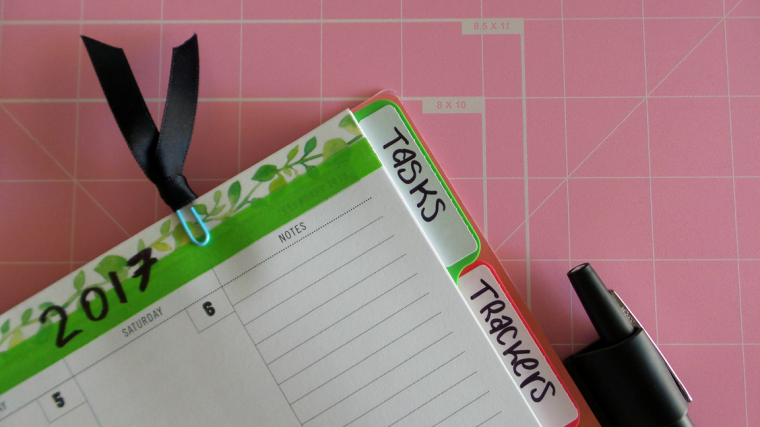
No, not The Notebook, just my notebook ;). If you’ve skimmed through this post, then I’m sure you’ll notice that instead of an Index from the traditional Bujo, I have everything organized by tabs. While the Index of a traditional Bujo is a great idea, for me, organizing my content with tabs makes things speedier.
The Future Log, aka Year-At-A-Glance
My monthly section actually isn’t organized within a tab as you can see. Because it’s the first thing you turn to after the Index in a traditional Bujo, it’s the same within my notebook as well.
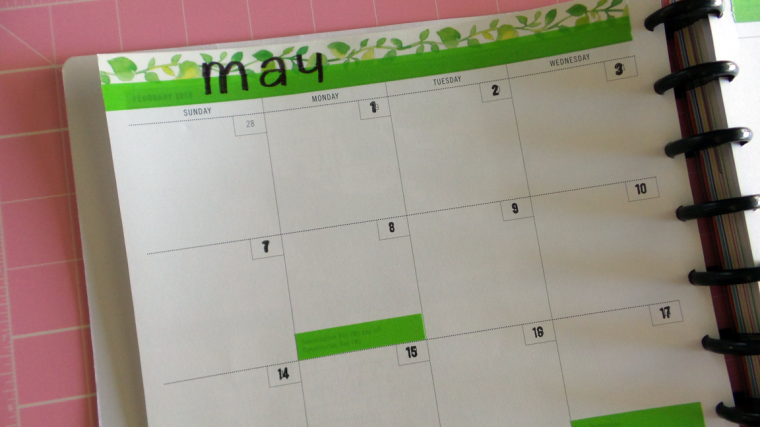
I use TULs dated monthly and weekly calendar, but you might notice that it looks a little odd. That would be due to the fact that I foolishly didn’t pay attention to what I was buying when I purchased it and I ended up with a 2018 calendar instead of a 2017 one and that’s okay! I broke out my month/days/dates stamp collection by Recollections and simply stamped over the dates. Above, I created what I needed for the month of May and put washi/crafting tape over the “wrong” month and holidays.
Dailies/Weeklies, aka Tasks
I’m a planner that uses Daily and Weekly spreads. It’s essentially a necessity for me since I work in retail and retail can often have an ever changing schedule. So my dailies include when I work, any appointments, and any tasks I need to try and complete.
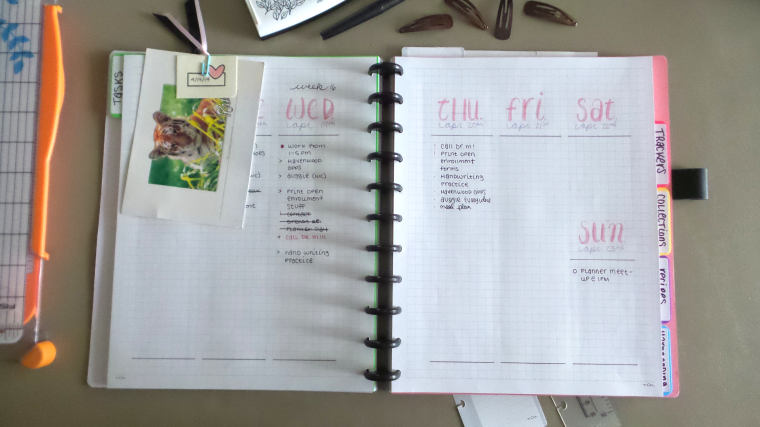
Until recently, I was using a spread that incorporated sidebars where I could include the week in a mini-calendar, weekly to-dos, trackers, and anything that came up to plan for the next week. However, with a larger sized notebook, utilizing the same spread was certainly doable, I quickly came to realize that incorporating the same weekly/daily spread was not going to work. A lot of space was going to be wasted due to the fact that I was a daily planner so I thought back to the times I used the Classic HP and decided to try a vertical-like layout.
So far, I can see some advantages. I still have plenty of space to add more tasks as they come up on a given day and still have room for notes or even to meal plan. And, as you can see, I’ve livened up the spread even more by adding a piece of snail mail I recieved on the 19th – a memory to look back on in the future! ^_^
Trackers
There are lots of things I keep track of every month. I have the common habit tracker, but I’ll be using the tracking tab for other things. Please forgive my typo if you spot it. It just goes to show that you shouldn’t plan at two o’clock in the morning!
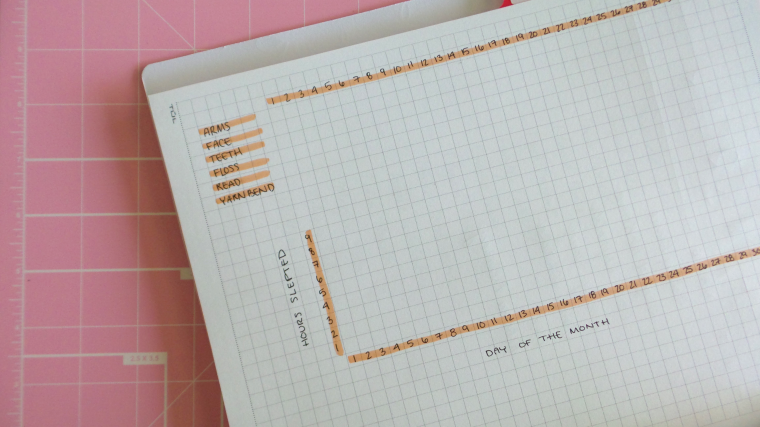
Included in the things I’ll be tracking is a list I need to keep track of for a hobby of mine, sleep, and for May specifically, every day I don’t spend money on materialistic items that I really don’t need, but certainly want (ie, a No Spend log).
Collections
The next tab is where my Collections go.
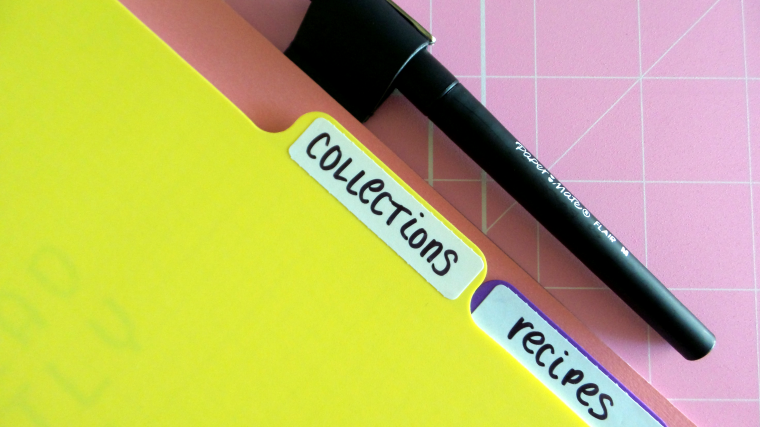
When I first started adding things to this tab, it also included crochet related things until I realized that all those things should be going into the Yarnbending tab. Oops? Now, my Collections includes things such as books I want to read, what I’m currently reading, and movies I want to see. There is certainly plenty to add (I plan to add a wine list soon), but I’m curious to know what you’ve got in your collections!


I’m sure from some of the tabs in the pictures above, you noticed that I have recipes. I also have a Yarnbending tab for projects I’m working on, but, at the time of this post, I have yet to transfer them from my junior size notebook to the letter sized one.
If you made it this far, congrats! You get a gold star because that was a little TL;DR-y ^_^;. I hope you enjoyed the read, found it interesting at least, or found some inspiration from it. If you did, please comment down below and I hope y’all enjoy your weekend.

I’m excited to see what your pages look like! These are some of mine if you are interested or want some inspiration 🙂 https://theobsessionbegins.wordpress.com/2017/04/22/getting-creative-with-your-bullet-journal/?frame-nonce=3aa5af2e5b
LikeLiked by 1 person
Aw, yay! And thank you for sharing your pages, too. Hopefully, the weather will be less dreary and more sunny next week for better pictures. 😁
LikeLiked by 1 person
I just bought one of the small ones today. I’m super excited to start filling it up! Thanks for the inspo!
LikeLike
I love these notebooks – They’re so versatile! I would also love to see what you do with yours, too. :)
LikeLiked by 1 person
I don’t know if bullet journalling is or will ever be for me, but it does allow for a lot of customization! Your bullet journal looks very organized!
LikeLiked by 1 person
Thank you so much for patience and thank you for the compliment. If you’re still on the fence about the system, I encourage you to give it a try for a couple months with any notebook and pen of your choice – If you don’t find it helpful then you’ll know it’s not for you.
LikeLike